Be.Smart Site Management
  • â„šī¸What is Be.Smart Site Management?
  • âš™ī¸Requirements
  • 💾Supported file formats
  • 🆕What's new ?
    • Q1/2023 Release
    • Q2/2023 Release
    • Q3/2023 Release
    • Q1/2024 Release
  • Getting started
    • Project set up in Trimble Connect
      • Create a project to Trimble Connect
        • Create a blank project (Trimble Connect)
        • Create a project based on template
      • User management in Trimble Connect environment
      • Project settings in Trimble Connect
    • Project set up in Autodesk Construction Cloud
      • Create a project to ACC
        • Create a blank project (ACC)
      • User management in ACC environment
    • Project set up in Site Management
      • Site Management - Project configuration
        • Coordinate reference system
        • Project location
        • Toggles
        • Coordinate formatting
        • AIS marine traffic
        • Application background maps
        • Background maps
        • Overlay maps
        • Default background map
        • Default models
        • Project links
        • Connections
        • Permissions and Metadata
      • Settings for Site Management
  • Site Management
    • Project interface
      • Toolbar
      • Project tree
      • Map interface
    • 📐Measurement tool
    • 📈Elevation tool
    • âœ‚ī¸Section tool
      • How to create a section
      • Measurements in sections
      • Breaklines in section
      • Print tool in a section
    • đŸ–¨ī¸Print tool
      • Print tool options
    • 📏Inspect breaklines
    • âœī¸Markings
      • Creating a marking
      • Editing a marking
      • Inspect markings
      • Filtering markings
      • Use-cases for markings
    • 📸Presets
      • Creating a preset
      • Open a preset
    • đŸ—ēī¸Map layers
    • đŸŽĨ3D viewers
  • Integrations and extensions
    • GeoView -integration
    • Pointscene -integration
      • Define the calculation type
      • Select the point cloud
      • Select the LandXML -file
      • Defining the boundary
      • Visualization
      • Results
    • Utilization -extension
      • Utilization report
    • Machine Control -extension
      • Novatron/MOBA Xsite Manage
      • Topcon Sitelink 3D v2
Powered by GitBook
On this page
  1. Integrations and extensions
  2. Pointscene -integration

Select the point cloud

PreviousDefine the calculation typeNextSelect the LandXML -file

No matter the calculation type, the next dialog is always "Select the point cloud".

There is a minor difference in the dialog depending on the calculation type, the number of steps varies between [1/3] and [1/4]. See the picture below.

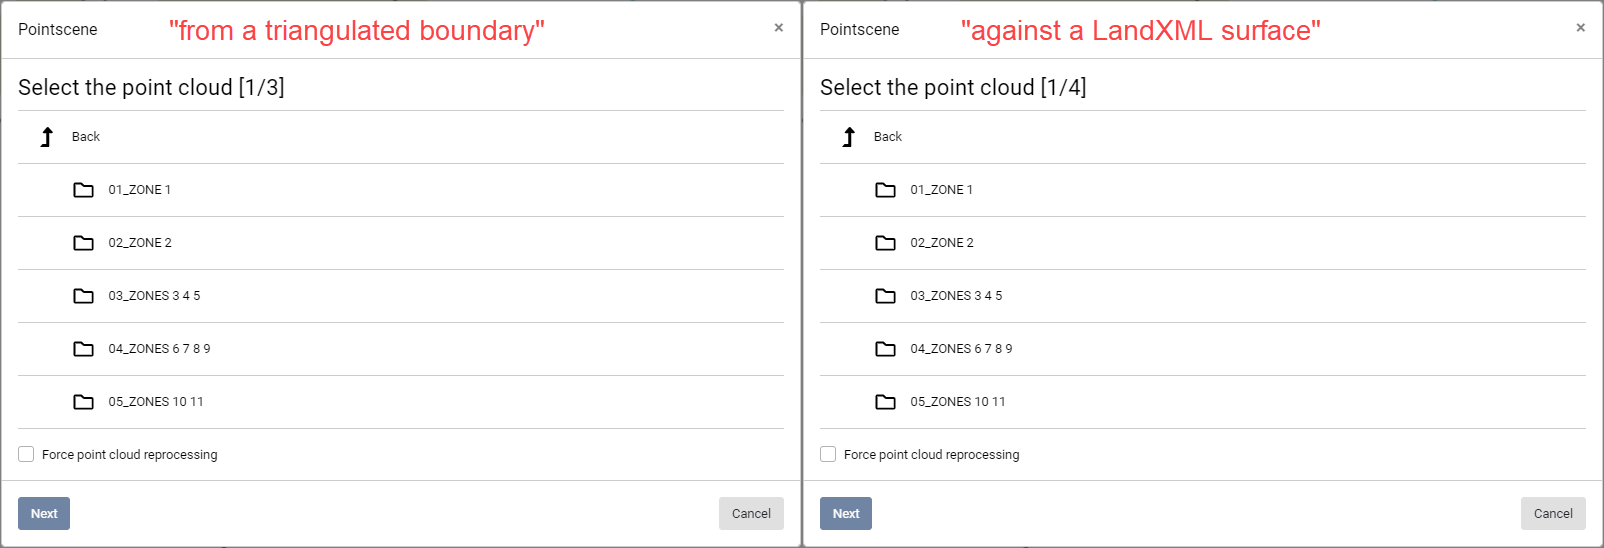
To continue, navigate to the location where point cloud is stored in.

Select the wanted point cloud -file from the folder structure by clicking the checkbox next to it.

Next -button will activate after a LAS or LAZ file is selected.

Please note that if the point cloud processing fails or the settings were incorrect, activate the "Force point cloud reprocessing" -check box. This recprocesses the point cloud and allows to change the settings.

Point cloud processing takes time, so use the reprocessing only when needed.

Processing should be a one time only action, the step will be skipped after the first processing and it makes the calculation faster.

Click Next -button to continue.

Configure point cloud

Like mentioned above, processing the point cloud should be needed only once. If the processing fails for some reason, reprocessing has to be done.

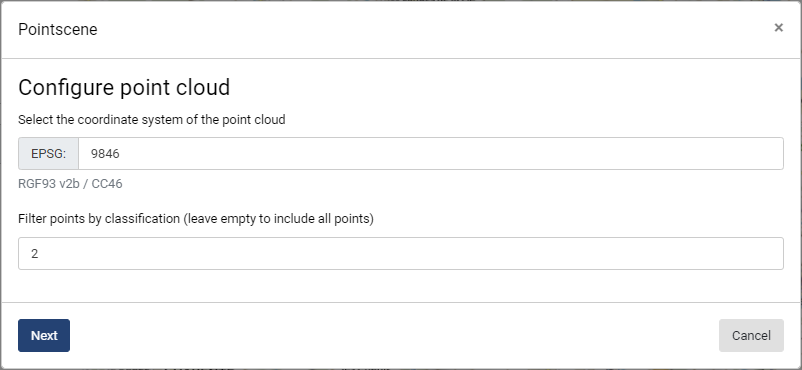
Configuring a point cloud requires two pieces of information. EPSG code of the point cloud and the information which classification of points is to be used.

Once a EPSG code is inserted, the name of the coordinate reference system is shown below. Make sure that the correct coordinate reference system is used. An error message is displayed if the EPSG code is not supported.

If the point cloud has classification, insert the wanted point code here. Multiple point codes can be added, separate these with comma.

If the point cloud doesn't have a classification or all points are needed for the calculation, please leave the field empty.

Once the configuration is done, click Next to continue.

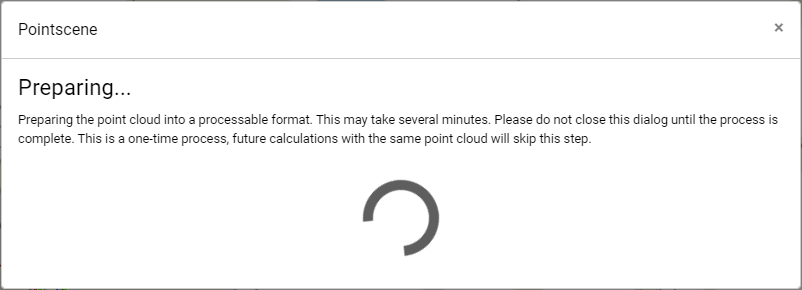
First time processing the point cloud may take several minutes, but once successful, this step will be skipped.

Difference between the dialog, depending on the selected calculation type
Configure point cloud
Processing -dialog