Visualization
Once the calculation is successful, there is one last thing to do, defining the visualization.

Coloring modes
There are two coloring modes:
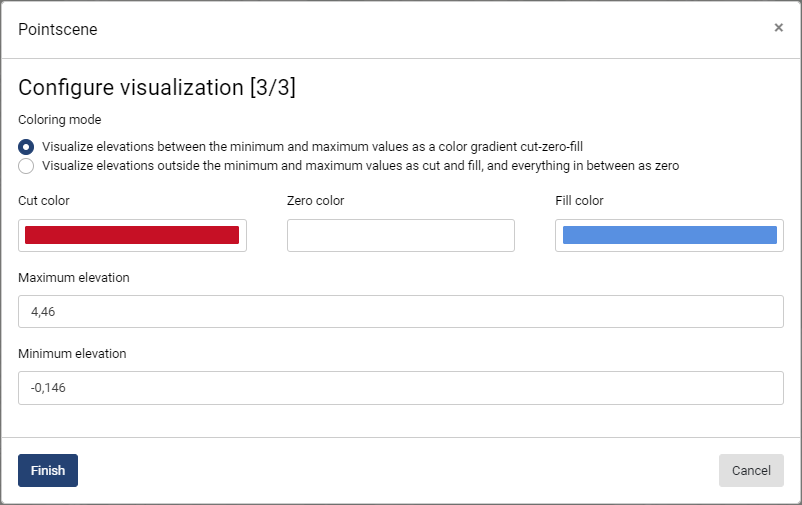
Visualize elevations between the minimum and maximum values as a color gradient cut-zero-fill
Visualize elevations outside the minimum and maximum values as cut and fill, and everything in between as zero
Coloring mode 1
The first mode creates a color gradient where the maximum and minimum -values are considered as limits. For example in the picture above, values higher than 4,46 will be displayed with fill color (Blue) and values lower than -0,146 will be displayed with cut color (Red).
Fill areas values between 4,46 and 0 the blue will turning whiter until it reaches 0 and the areas with 0 value are displayed white.
Same thing with cut areas, values between -0,146 and 0 the red will be turning whiter until it reaches 0 and the areas with 0 value are displayed white.
Coloring mode 1 is great for early phases of the project to highlight areas where there will be cut and fill.
Coloring mode 2
The second mode is more straight-forward, where the maximum and minimum -values are also considered as limit. For example in the picture above, values higher than 4,46 will be displayed with fill color (Blue) and values lower than -0,146 will be displayed with cut color (Red).
The difference is the evertyhing between 4,46 and -0,146 is considered to be zero. There is no gradient coloring, but instead it is either blue, white or red area.
Coloring mode 2 is great way of following up the progress on the site. For example if there is drone data from the actual road bed, compare that to the designed road bed.
Set maximum and minimum values to 0,05 and -0,05 - meaning all the white colored areas are within the tolerance.
Red color means that area has been dug too deep.
Blue color means that area has not been dug deep enough.
Cut / Zero / Fill -colors
There are three colors that need to be defined; cut, zero and fill.

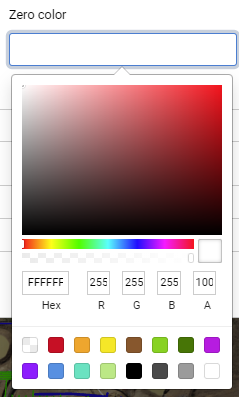
Colors can be defined by hand using the different sliders, HEX -code, RGB -code or presets. The A-value on right defines the transparency. Where the value 100 means that the color cannot be seen through and value 0 means that it is fully seethrough.
Elevation values
There are two elevation values, maximum and minimum. These are automatically filled by the results of the calculation. Maximum is the highest and minimum is the lowest value that the calculation returns. These can be changed to highlight areas with certain values.
Once evertyhing is set up as wanted, click Finish to display the results.